May
This procedure generally applies to Cat 5e RJ45 connectors. An alternate method is given for connectors
What you need to make an ethernet cable patchcord –
- Crimping tool
- Rj 45 Connector
- Ethernet/ LAN Cable

Step 1
Cut the cable to the length needed.

Step 2
Strip back the cable jacket approximately 1 inch.
Use the crimping tool cutter provided or strip by hand.
Be careful not to nick the individual wires.
Un-twist each of the 4 pairs and straighten each wire as much as possible between the fingers.

Step 3
Trim the tips of the wires with a crimping tool to make tips neat and reserve appropriate length.
Step 4
Use the 568-B or A wiring scheme on both ends for a standard patch cable.

Step 5
Arrange the wires in the order and push the wires into the Cat6 connector to the deepest position.
Note: Your wire’s Outside Diameter(OD) including the plastic housing should not exceed 1.0mm to match the wire guide

- Bring all of the wires together as closely as possible.
- Hold the grouped (and sorted) wires together tightly between the thumb, and the forefinger.
- Cut all of the wires at a perfect 90-degree angle from the cable,
- 1/2 inch from the end of the cable jacket.
- Use a sharp cutting tool so as not to “squash” the wire ends.
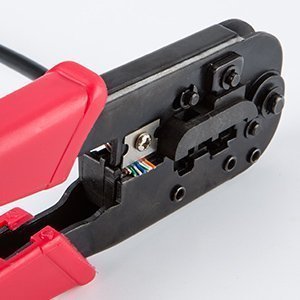
Step 6
Put the wired crystal RJ45 end into the cable clamp for crimping.
With the connector pins facing up, carefully insert the wires into the connector.
Apply a moderate amount of force in order to properly seat the wires against the contacts in the connector.
Step 7
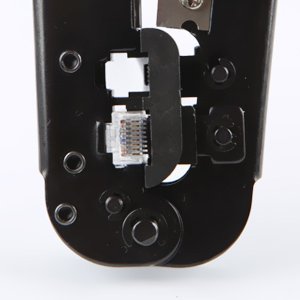
Put the wired crystal RJ45 end into the cable clamp for crimping. And, squeeze hard so that the handle reaches its full swing.
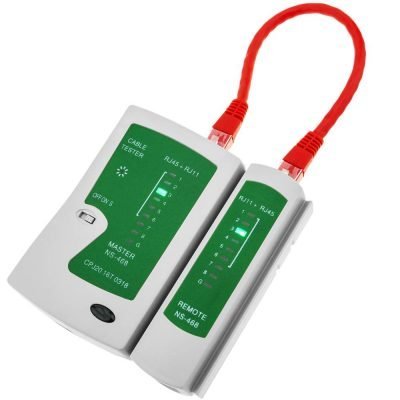
Step 8
Always use a cable tester to check for continuity, opens, and shorts.