May
How to Terminate a Cat6 Ethernet Cable with an RJ45 Connector in less than a minute
To terminate a Cat6 cable with an RJ45 connector, you need to carefully follow specific steps to maintain the cable’s performance standards. The process requires precision in handling the wires and ensuring the correct color order is used on both ends of the cable.
Tools and Materials Needed
- Cat6 Ethernet cable
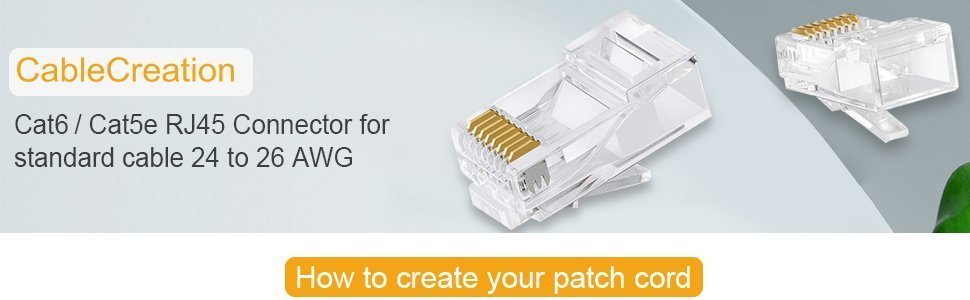
- RJ45 connectors specifically rated for Cat6 cable (standard or pass-through type)
- Cable stripper designed for network cables
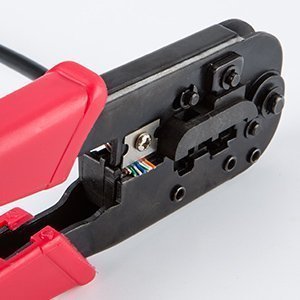
- Crimping tool(ideally with a ratcheting mechanism and compatible with your connector type)
- Flush cutters or sharp scissors
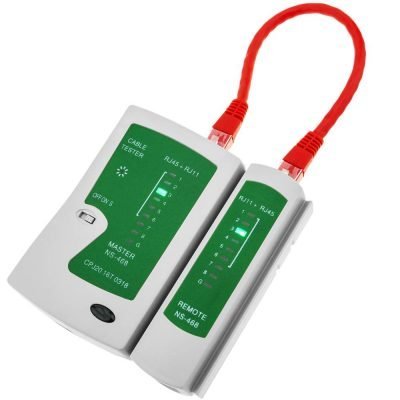
- Cable tester(highly recommended for verifying the connection)
Step-by-Step Instructions
- Cut the Cable to Length: Measure and cut the Cat6 cable to the desired length, leaving a few extra inches for maneuvering.
- Strip the Outer Jacket: Use the cable stripper to carefully score and remove about 1 to 1.5 inches (2.5 to 4 cm) of the outer jacket. Be careful not to nick the insulation of the internal twisted pairs.
- Remove Internal Structures: Cat6 cables often have a plastic cross-spline or a ripcord for structural integrity. Use flush cutters to carefully trim these internal components down to the edge of the remaining jacket. If it is a shielded cable, fold the drain wire back along the outer jacket.
- Untwist and Straighten Wires: Gently untwist each of the four wire pairs. Tighter twists in Cat6 require more effort to straighten. Use your fingers or the smooth shank of a screwdriver to work out the kinks and make the individual wires as straight as possible.
- Arrange Wires in Order: Choose a wiring standard, either T568A or T568B, and use it consistently for both ends of the cable for a standard “straight-through” cable. T568B is the most common standard in Kenya
- T568B Order (left to right, with the RJ45 tab facing away from you):
- White/Orange
- Orange
- White/Green
- Blue
- White/Blue
- Green
- White/Brown
- Brown
- T568B Order (left to right, with the RJ45 tab facing away from you):
- Trim Wires Evenly: Pinch the wires tightly in the correct color order and use flush cutters to trim them all to a uniform length, about 1/2 inch (1.25 cm) from the edge of the jacket. A clean, straight cut is essential for the wires to seat properly in the connector.
- Insert Wires into RJ45 Connector: Keep the wires flat and in order, and carefully insert them into the RJ45 plug. Push them firmly until each wire tip reaches the very front of the connector and the cable jacket is seated inside the plug under the strain relief tab.
- Crimp the Connector:Place the prepared RJ45 plug into the crimping tool’s designated slot. Squeeze the handles firmly and apply consistent pressure until the tool cycles completely. This secures the wires and the jacket.
- Test the Connection (Optional but Recommended):Plug both ends of the terminated cable into a cable tester to verify continuity and ensure all eight pins are correctly wired. This helps identify any issues before installation.

Step 1
Cut the cable to the length needed.

Step 2
Strip back the cable jacket approximately 1 inch.
Use the crimping tool cutter provided or strip by hand.
Be careful not to nick the individual wires.
Un-twist each of the 4 pairs and straighten each wire as much as possible between the fingers.

Step 3
Trim the tips of the wires with a crimping tool to make tips neat and reserve appropriate length.
Step 4
Use the 568-B or A wiring scheme on both ends for a standard patch cable.

Step 5
Arrange the wires in the order and push the wires into the Cat6 connector to the deepest position.
Note: Your wire’s Outside Diameter(OD) including the plastic housing should not exceed 1.0mm to match the wire guide

- Bring all of the wires together as closely as possible.
- Hold the grouped (and sorted) wires together tightly between the thumb, and the forefinger.
- Cut all of the wires at a perfect 90-degree angle from the cable,
- 1/2 inch from the end of the cable jacket.
- Use a sharp cutting tool so as not to “squash” the wire ends.
Step 6
Put the wired crystal RJ45 end into the cable clamp for crimping.
With the connector pins facing up, carefully insert the wires into the connector.
Apply a moderate amount of force in order to properly seat the wires against the contacts in the connector.
Step 7
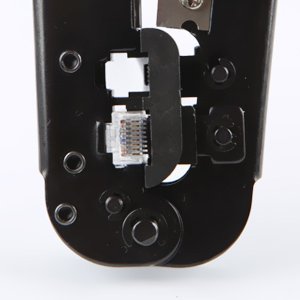
Put the wired crystal RJ45 end into the cable clamp for crimping. And, squeeze hard so that the handle reaches its full swing.
Step 8
Always use a cable tester to check for continuity, opens, and shorts.